When visitors submit form messages to you through your contact page or custom-made forms, you will receive them in two places: The Email addresses you set as the recipient in your page or form settings and your form messages list located in your account Dashboard.
Go to your website Dashboard.
Under Activities, click Form messages.

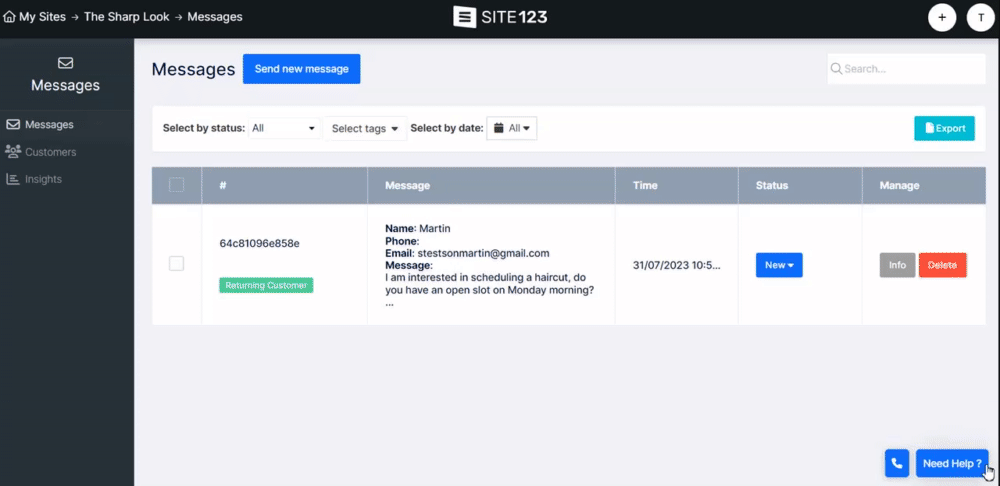
Under the message tab, you can
filter messages, reply to received messages, create new messages, and export the messages to a CSV file.
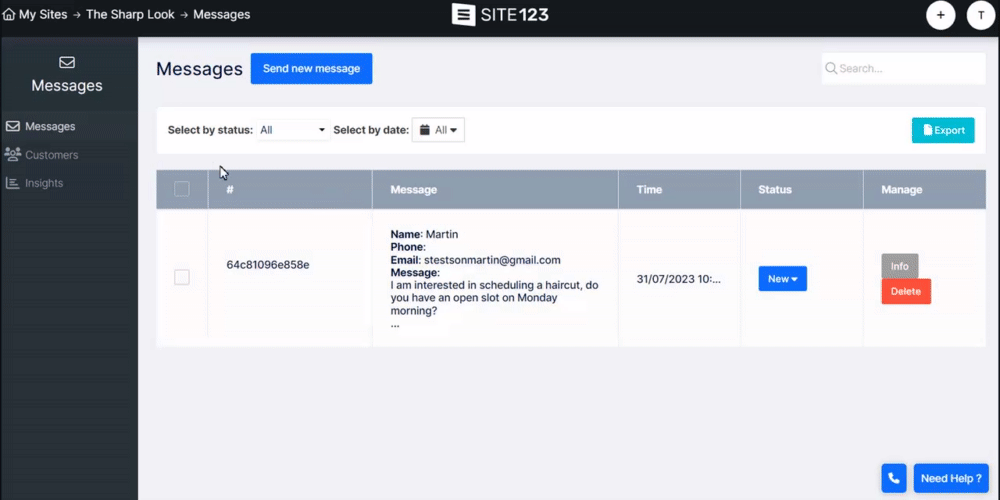
Filter your message list by message status and date.
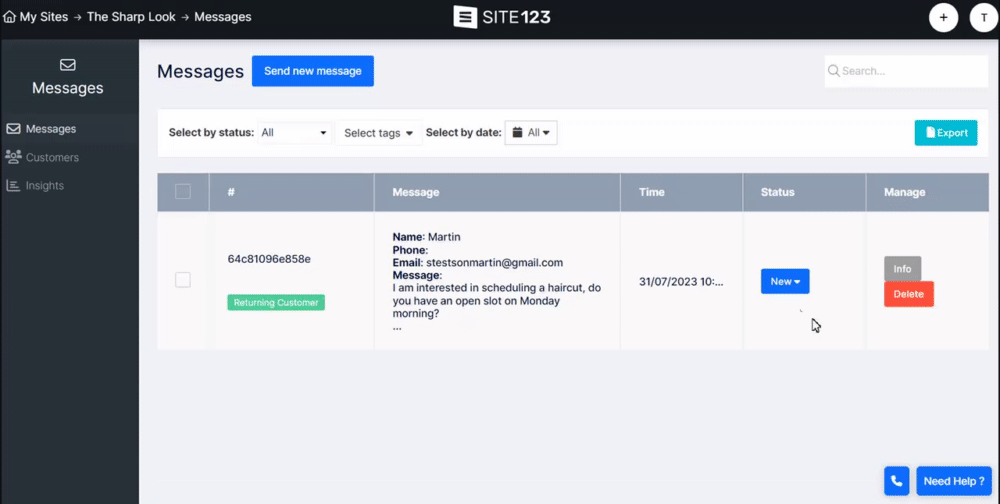
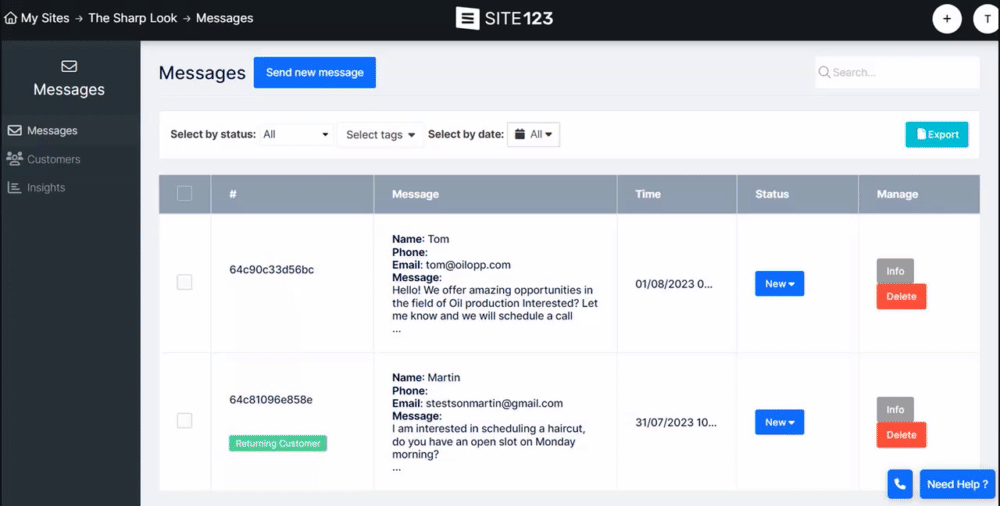
Place your mouse cursor over the message ID, you will be presented with the option to create a customized tag to go along with your messages, this will allow you to further categorize your messages by adding information relevant to you and your business.
Manage your messages by setting the status of each message choose from New, In Progress, Pending, Completed, or Canceled.
Click to see more Info and see the received message. Alternatively, you can click on the message itself to open the info screen.

You can delete unwanted messages by clicking the delete button.
Use the Export option to export your messages in CSV format.

In your info tab, you will have the option to reply to your user's messages,
Click reply to create the reply message. Your users will receive your reply to the email address they provided, with the option to reply back, which will allow you to communicate with them more easily and effectively. All messages will be presented as threads to the original message in the info window.
Communicate with your users by sending them emails directly from your Dashboard through your form messages, You can create a new email to users who have already contacted you in the past or send messages to clients who purchased your service or store products.
This tool can be used to inform specific users of updates and relevant information.

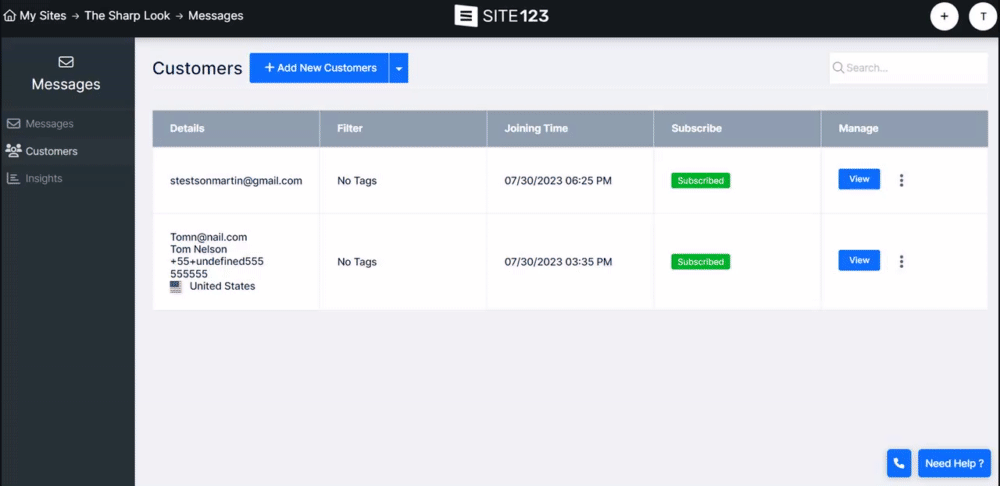
In your Customer Tab, you can view all of your customers, both subscribed and unsubscribed customers. You can Manage customer information, add customized tags, and send them messages. Read more about the Customer Tab.

Use the Export and Import option to manage existing customers or add new ones.
Export - Exporting your customer list will allow you to manage your customers using external software such as Microsoft Excel or Google Sheets.
Import - If you already have a CSV file containing a list of customers, you can import it into your website customer list and add them to it.
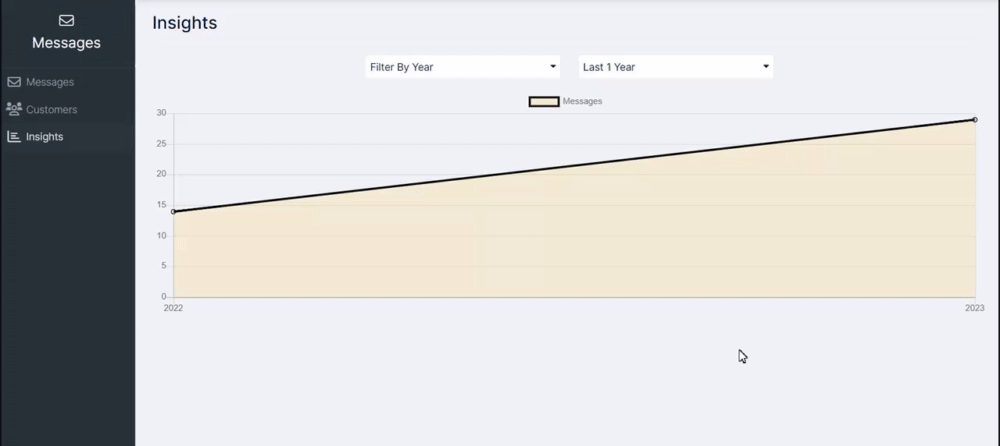
Inside the Insights tab, monitor and analyze received messages.
You can filter your messages by Year, Month, Day, Last 30 or 60 days, and more.
This way, you can see how many users engaged you and contacted you.
👉 Note: Free websites will need to go to their Dashboard to see the full message, while Premium users will be able to see the full message in their recipient email as well.