
In this guide, you will learn how to allow visitors to book a meeting, class, consultation, or any other service you offer. You will learn how to add and manage your booking page, add prices and payment methods, create notifications, set cancelation periods, and more.
In the Website Editor, click Pages.
Find the Contact page in the current page list, or Add it as a New Page.
Edit the page Title and Slogan. Read more about Adding a Slogan.
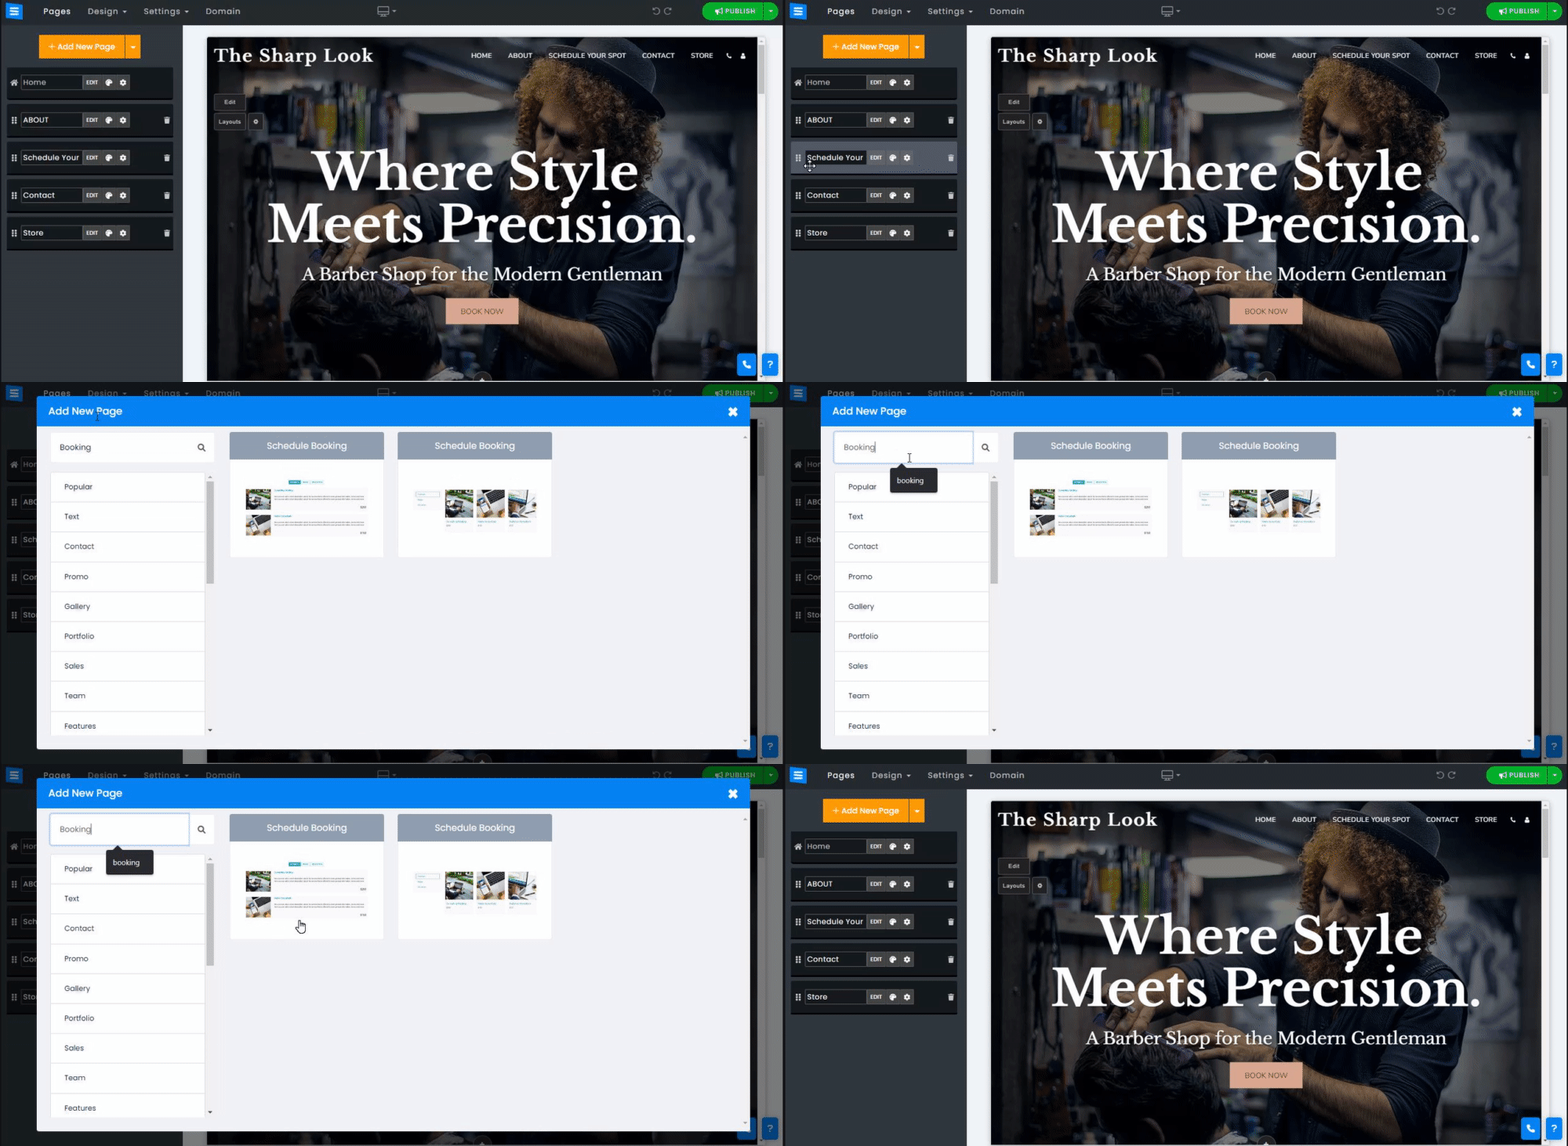
In this section, you will learn how to Add, remove, and manage the items on your Schedule Page.
Click the Edit button.
Click the Arrows icon and drag to reposition an item in the list.
Click the Three dots icon to Edit, Duplicate, Preview, or Delete an item.
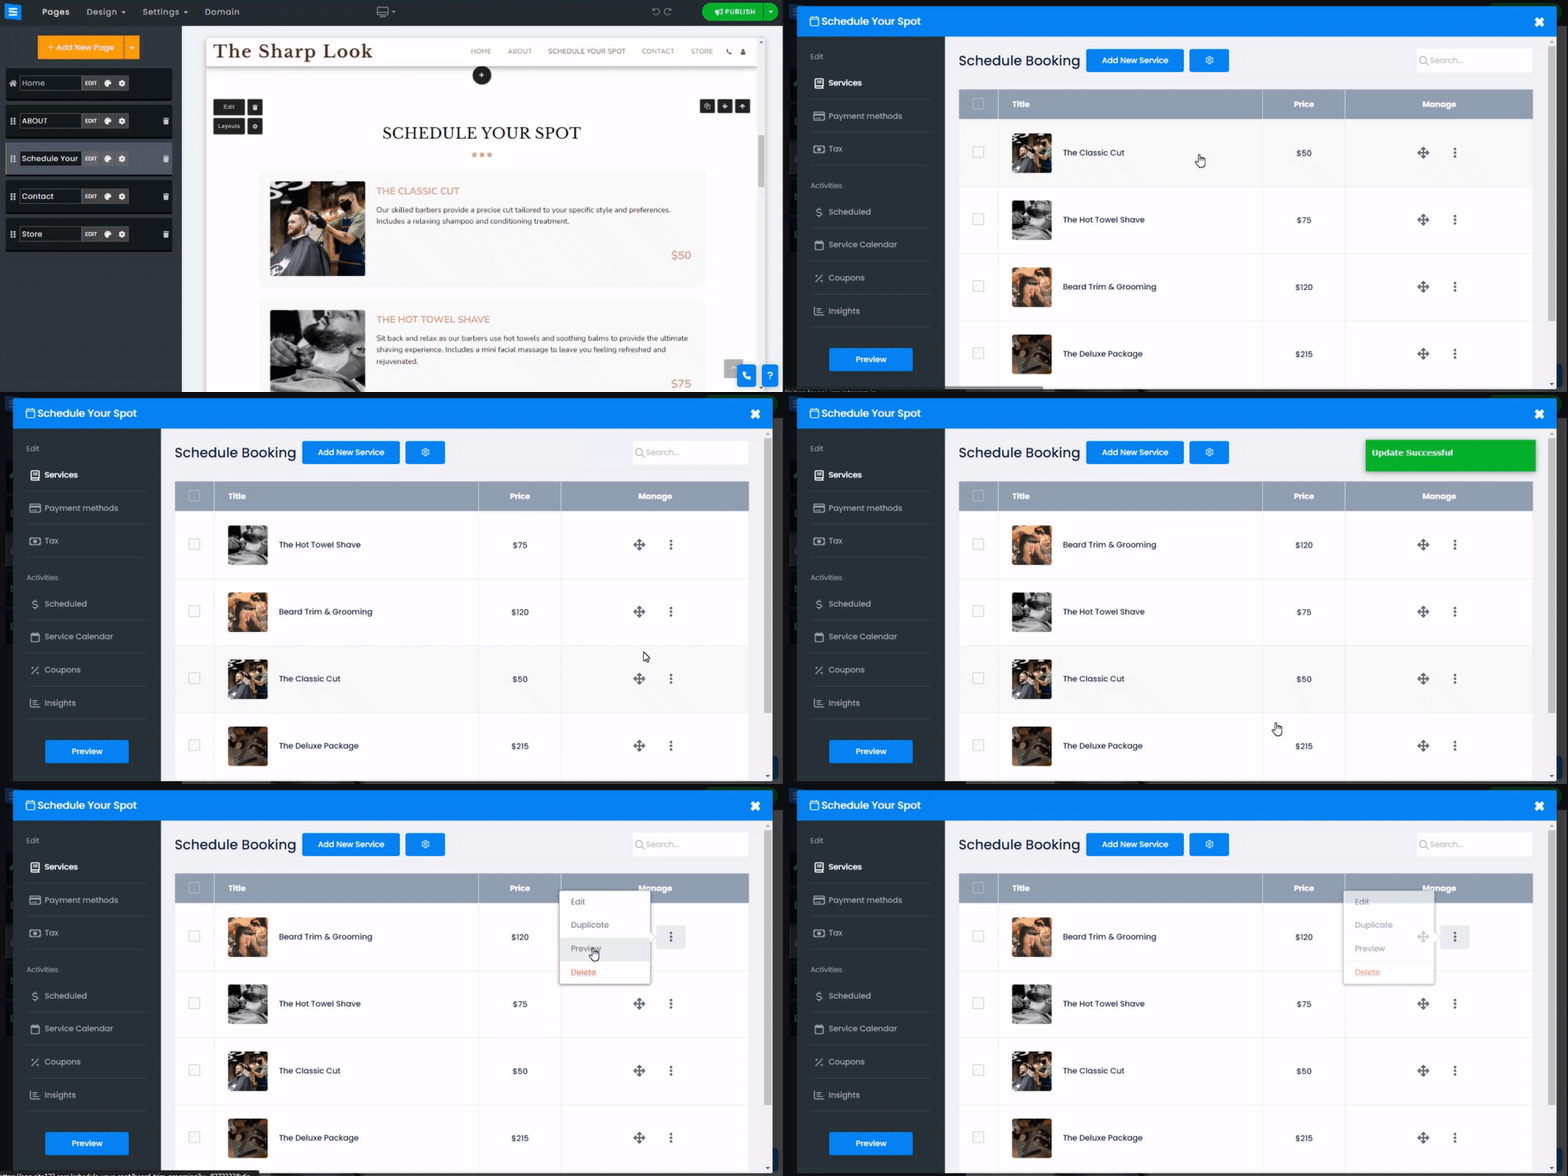
Add general information regarding the provided service.
Service Type - Select the type of service, personal or Group meeting/appointment
Title - Set the title of the service, for example, consultation
Short description- Add a short description of the service. Use TextAI to add customized AI-generated text
Category - Add a service category or choose from an existing one. Once added, a new category would appear on the side of your item list, and the new category would be added underneath the page title as well.
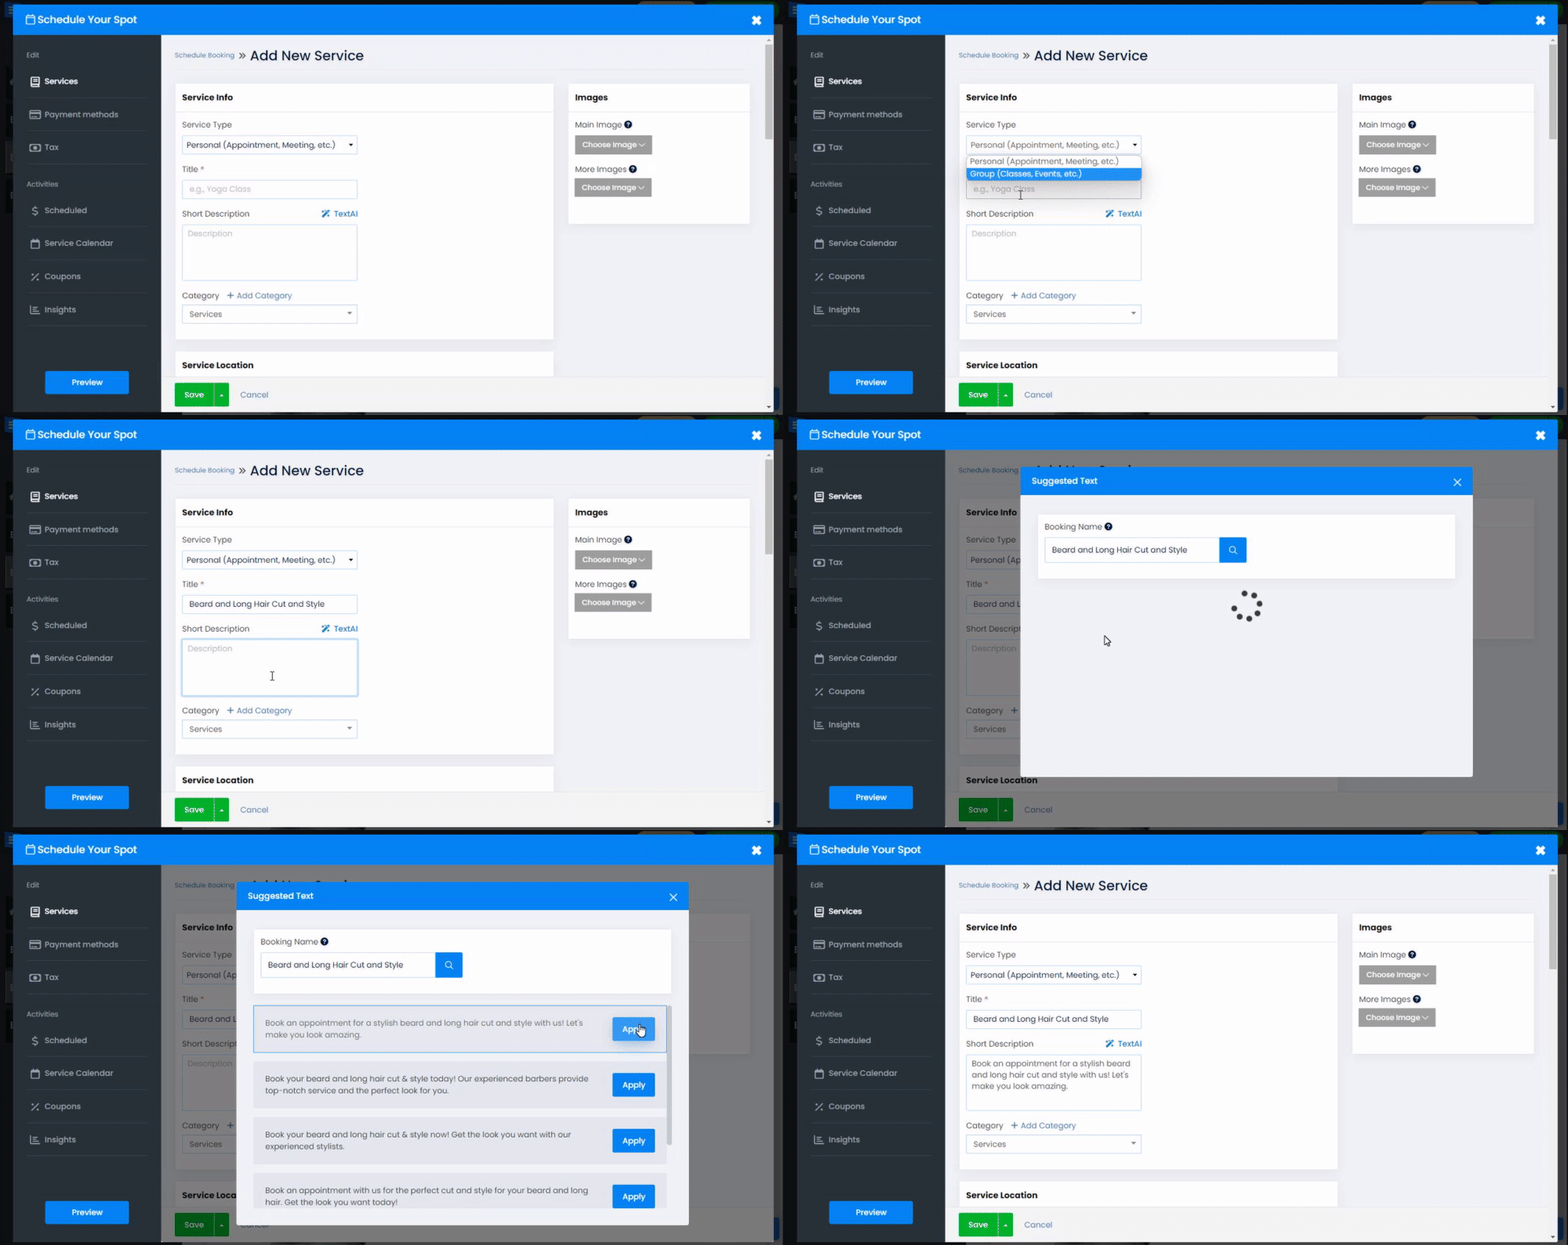
Add up to two images. You can upload the image from your computer, choose one from the image library, or add one from an external source such as Facebook. (Main Image size limit 50MB, More Images size limit 100MB).
Use the Crop Icon to open the Image Editor.
Use the Red X Icon to remove the picture.
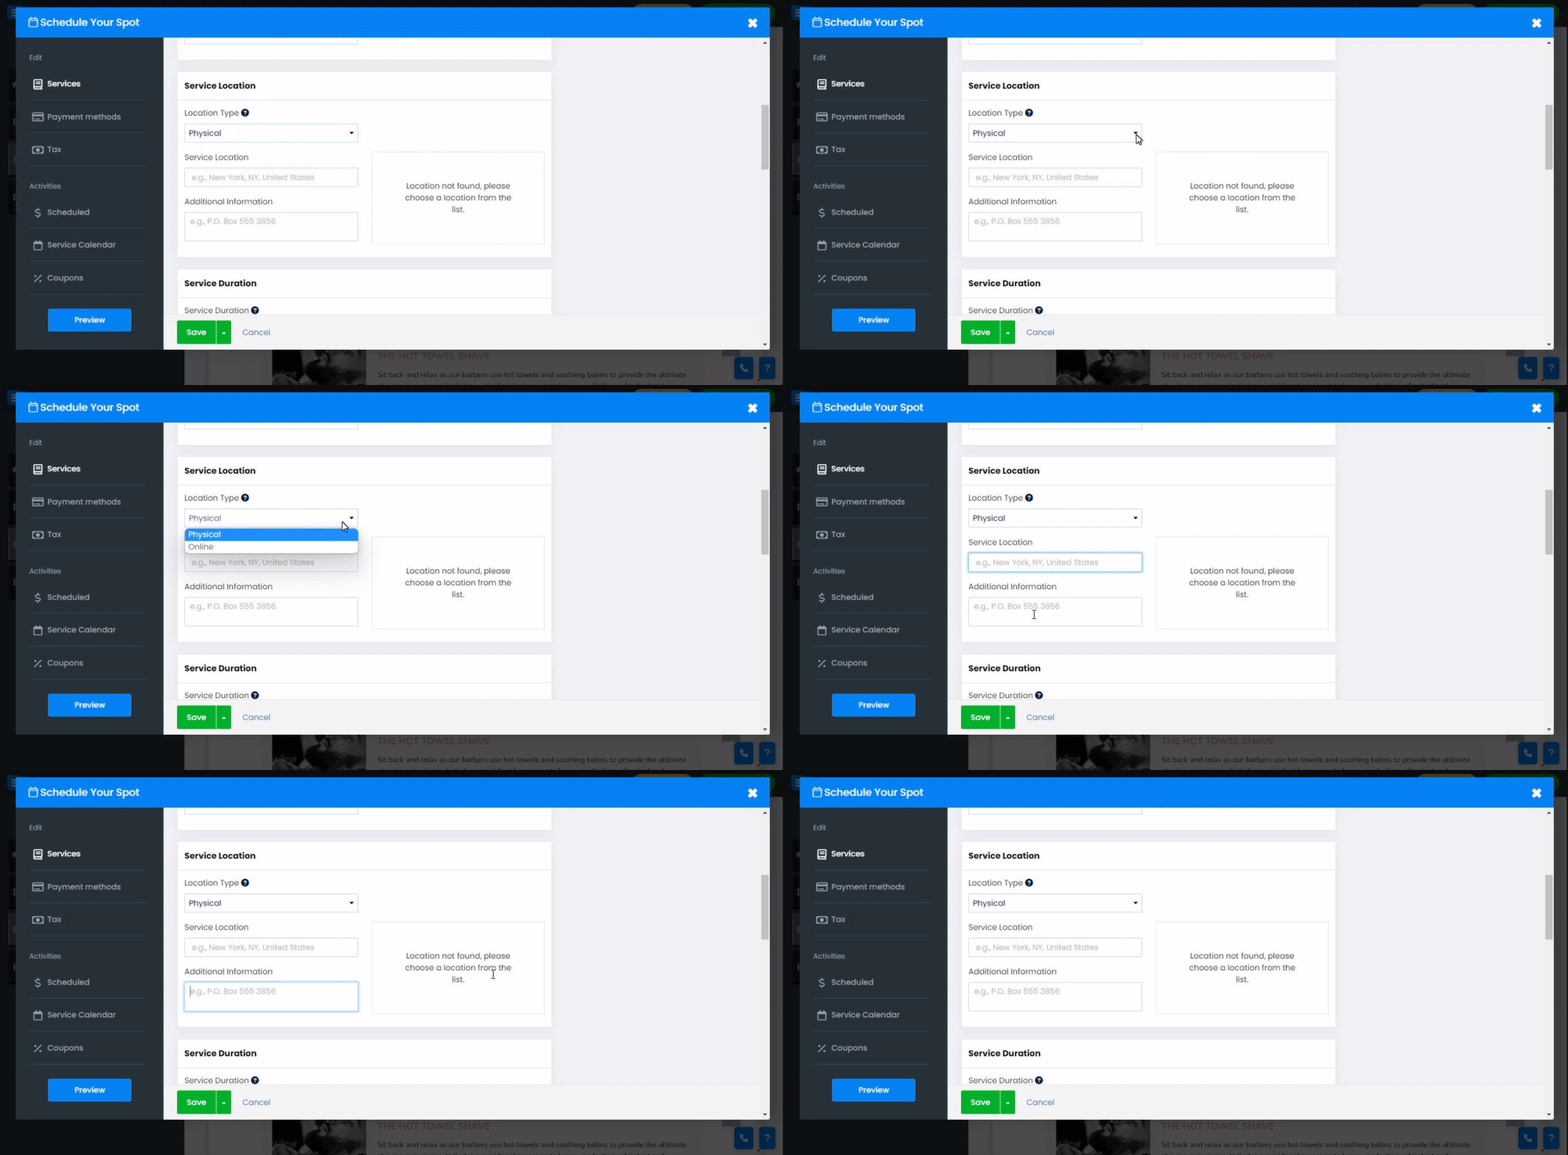
Location Type - Choose the type of service, Physical or online.
Service location - Add the location of the provided service ( Address, city, state, etc.).
Additional information- Add more information regarding the service location, such as a P.O. box.
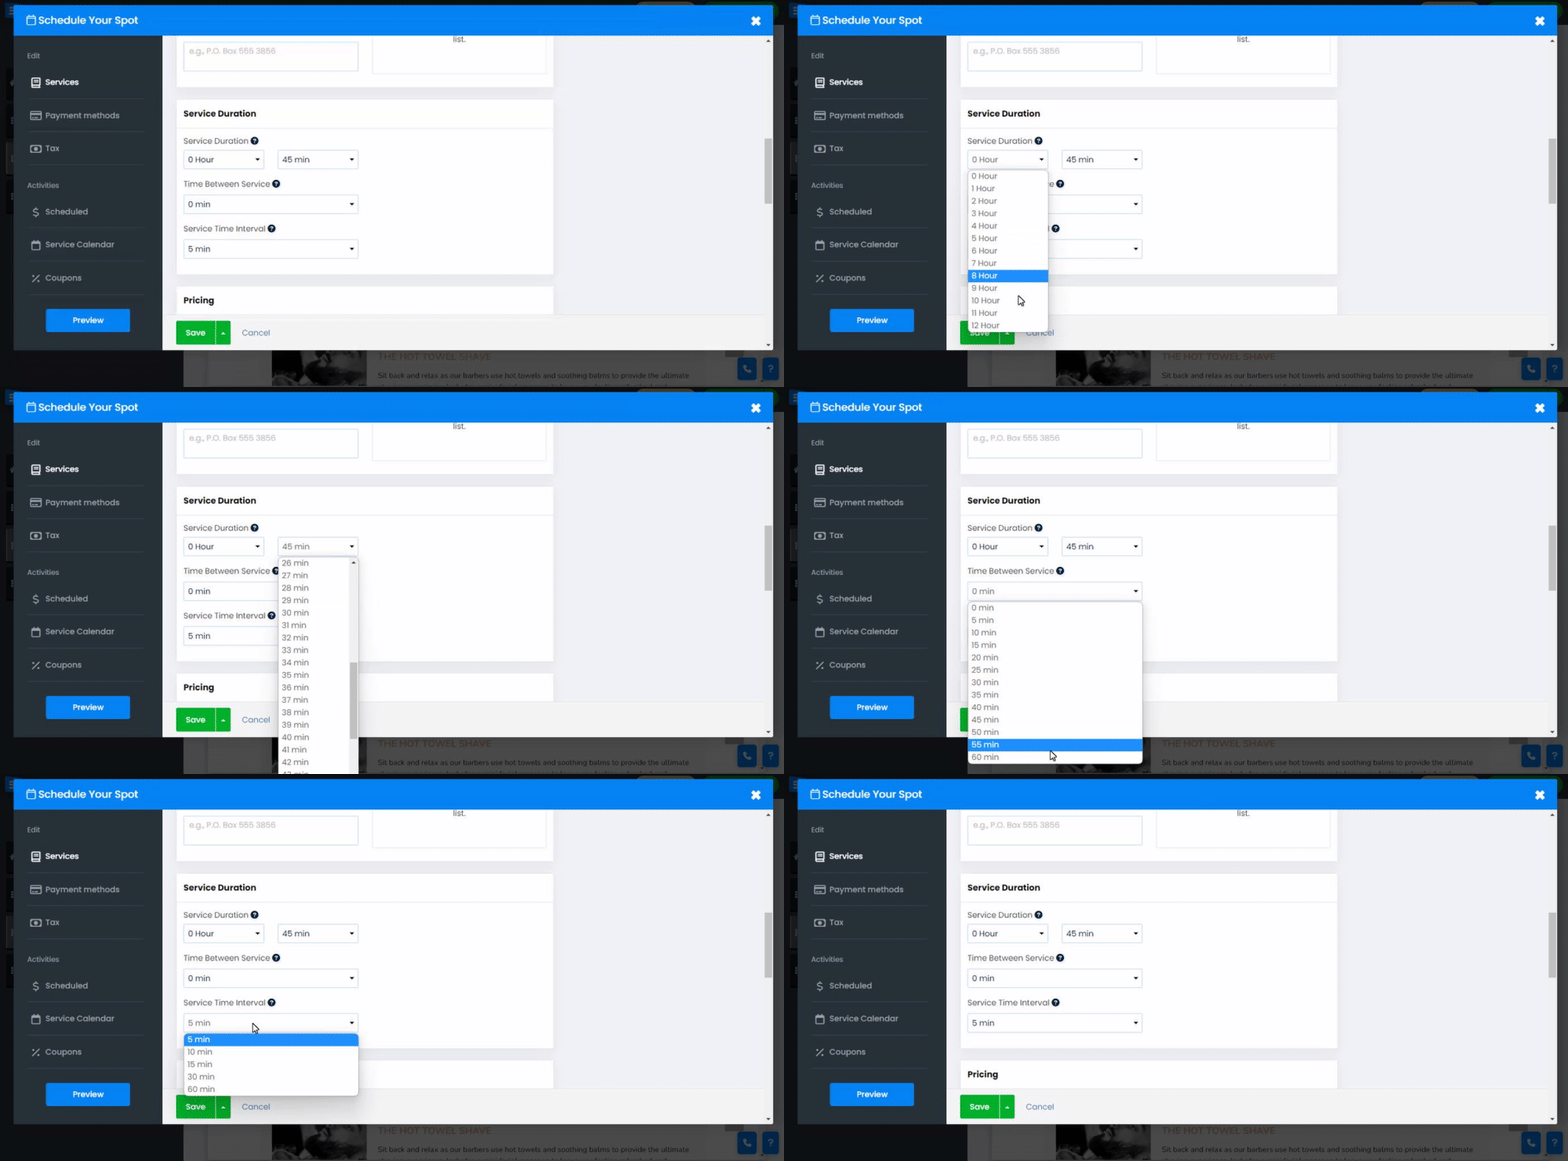
Service duration - Set the duration of your service. You can set hours and minutes separately.
Time Between - Set an off time between services, such as a break.
Service Time Interval - Set the time intervals that your users can choose from when scheduling a service.
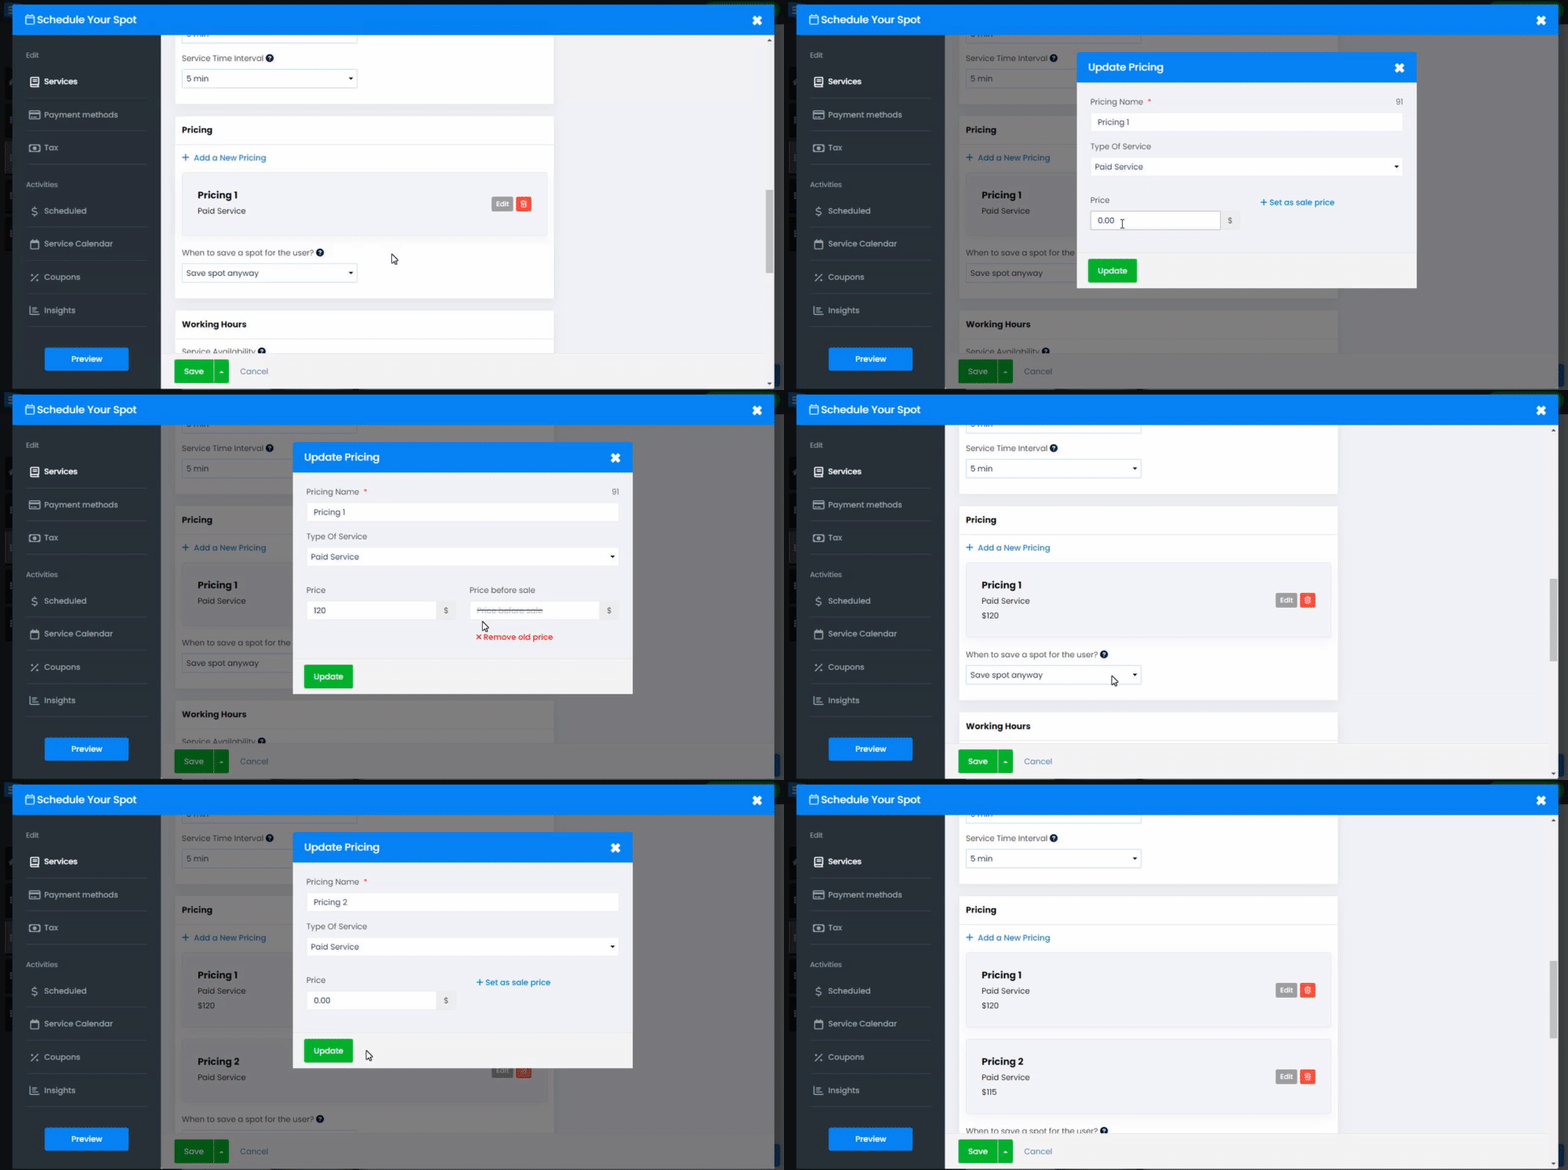
Set the price of the provided service.
Under the pricing section, you will have a default price set up. Click edit to add the actual price of the current service or use the multi-pricing feature to add a new pricing option, which will create a range of the service price according to your needs, for example, different prices for different meeting periods.
In the settings window, edit the following:
Pricing name - Set up the name of the current pricing
Type of service - Set the service to paid or Free
Price - Add the service price
Set as sale price - This option will allow you to create a sale price by allowing you to display the new price while on Sale in comparison to the regular price (the old price will appear with a strikethrough line)
Save a spot - Choose to save the spot when a client makes a purchase or to save it when a booking is made.
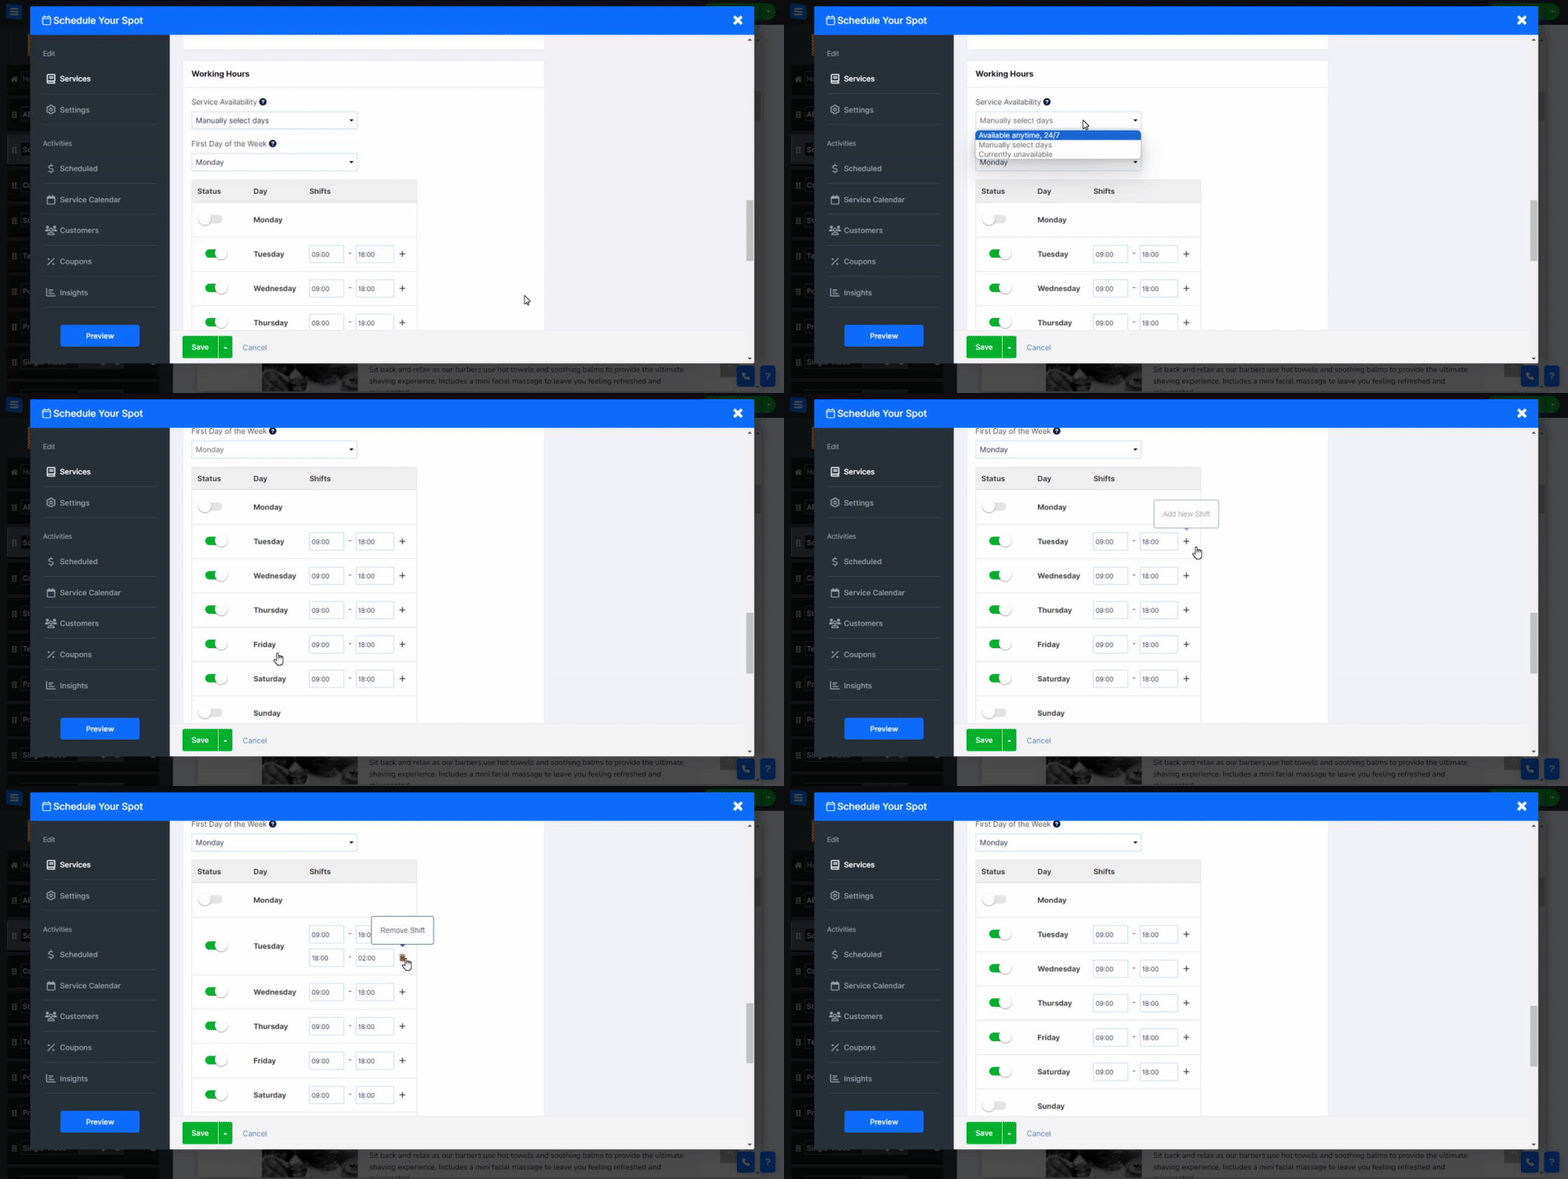
Service Availability - Set your availability. You can set it to be available 24/7, Manually selected hours, or set your business to unavailable.
First day of the week - Set the first day of your working week (Sunday/Monday). This will affect the calendar your clients would see when booking a service.
Working Days - Set specific working days by Toggleing them ON and OFF as well as the working hours for each day. The Shift Table will also allow you to set multiple working hours on the same day, you can add up to 10 shifts per day, for example, 09:00 to 14:00 and 18:00 to 20:00.
👉 Note: Using the Shift option means that there is a gap of inactivity between the different shifts. This function is not meant to set hourly working hours.
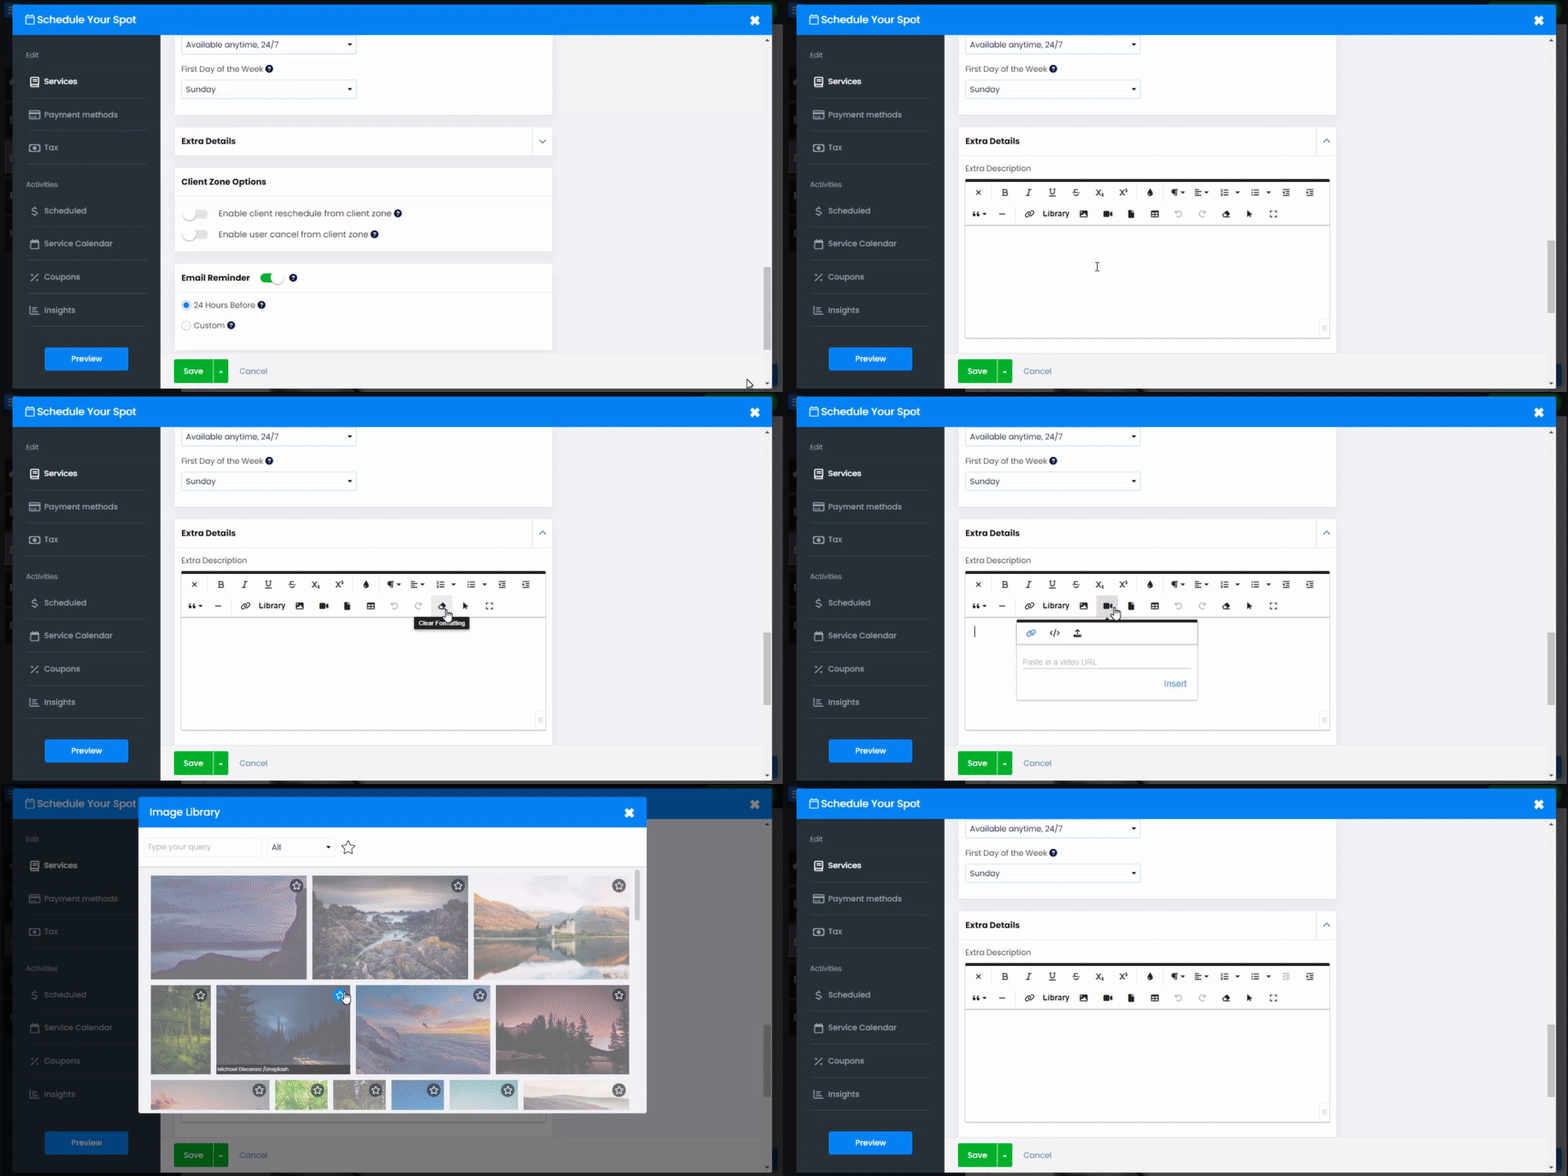
Add more detailed information about your services, use the Text editor to stylize your text, as well as add images, videos, links, tables, and so on. Read more about the Text Editor.
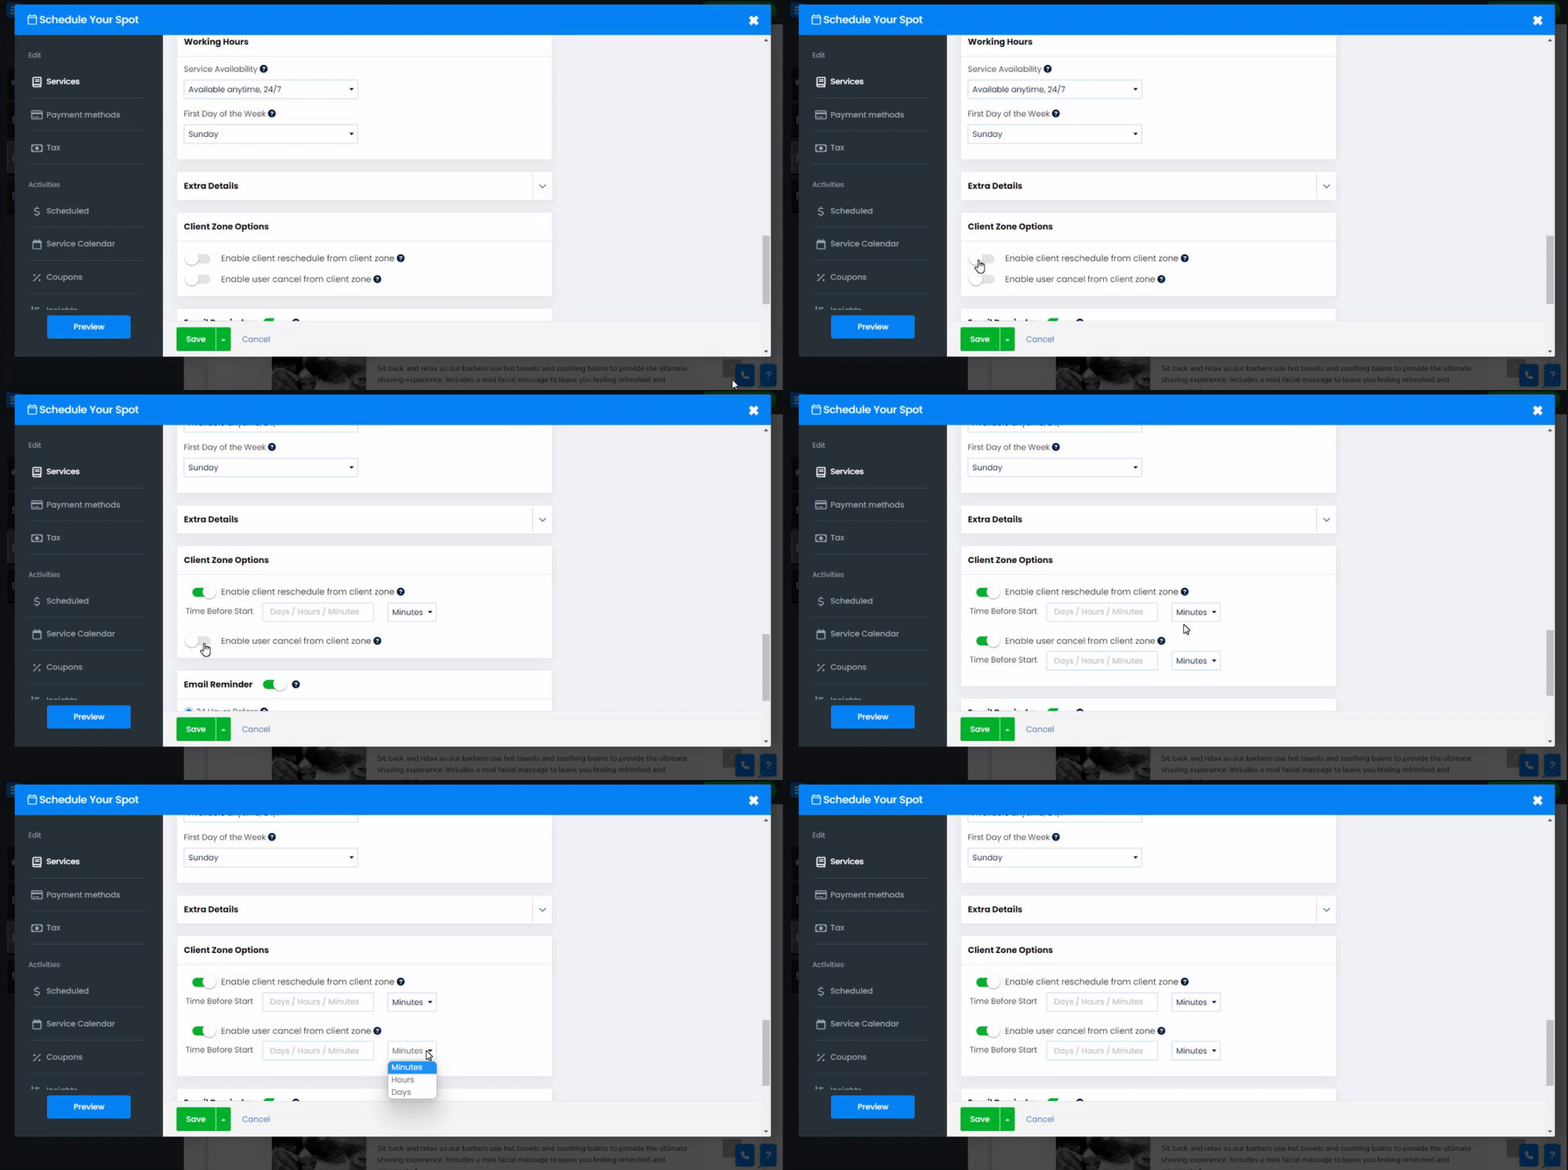
Allow your clients to reschedule or cancel appointments right from their client zone profile. Read more about The Client Zone Tool.
Enable client Reschedule - toggle this option ON if you allow your clients the option to reschedule their appointment with you.
Enable user to Cancel - Toggle this option ON if you allow your clients the option to cancel an appointment with you.
Time before Start - This function will allow you to set a date and specific time on which you must be notified before the cancelation or rescheduling of service.
This option will allow you to set a time frame after which a service cannot be canceled and will become available when you toggle ON the cancelation or reschedule options.
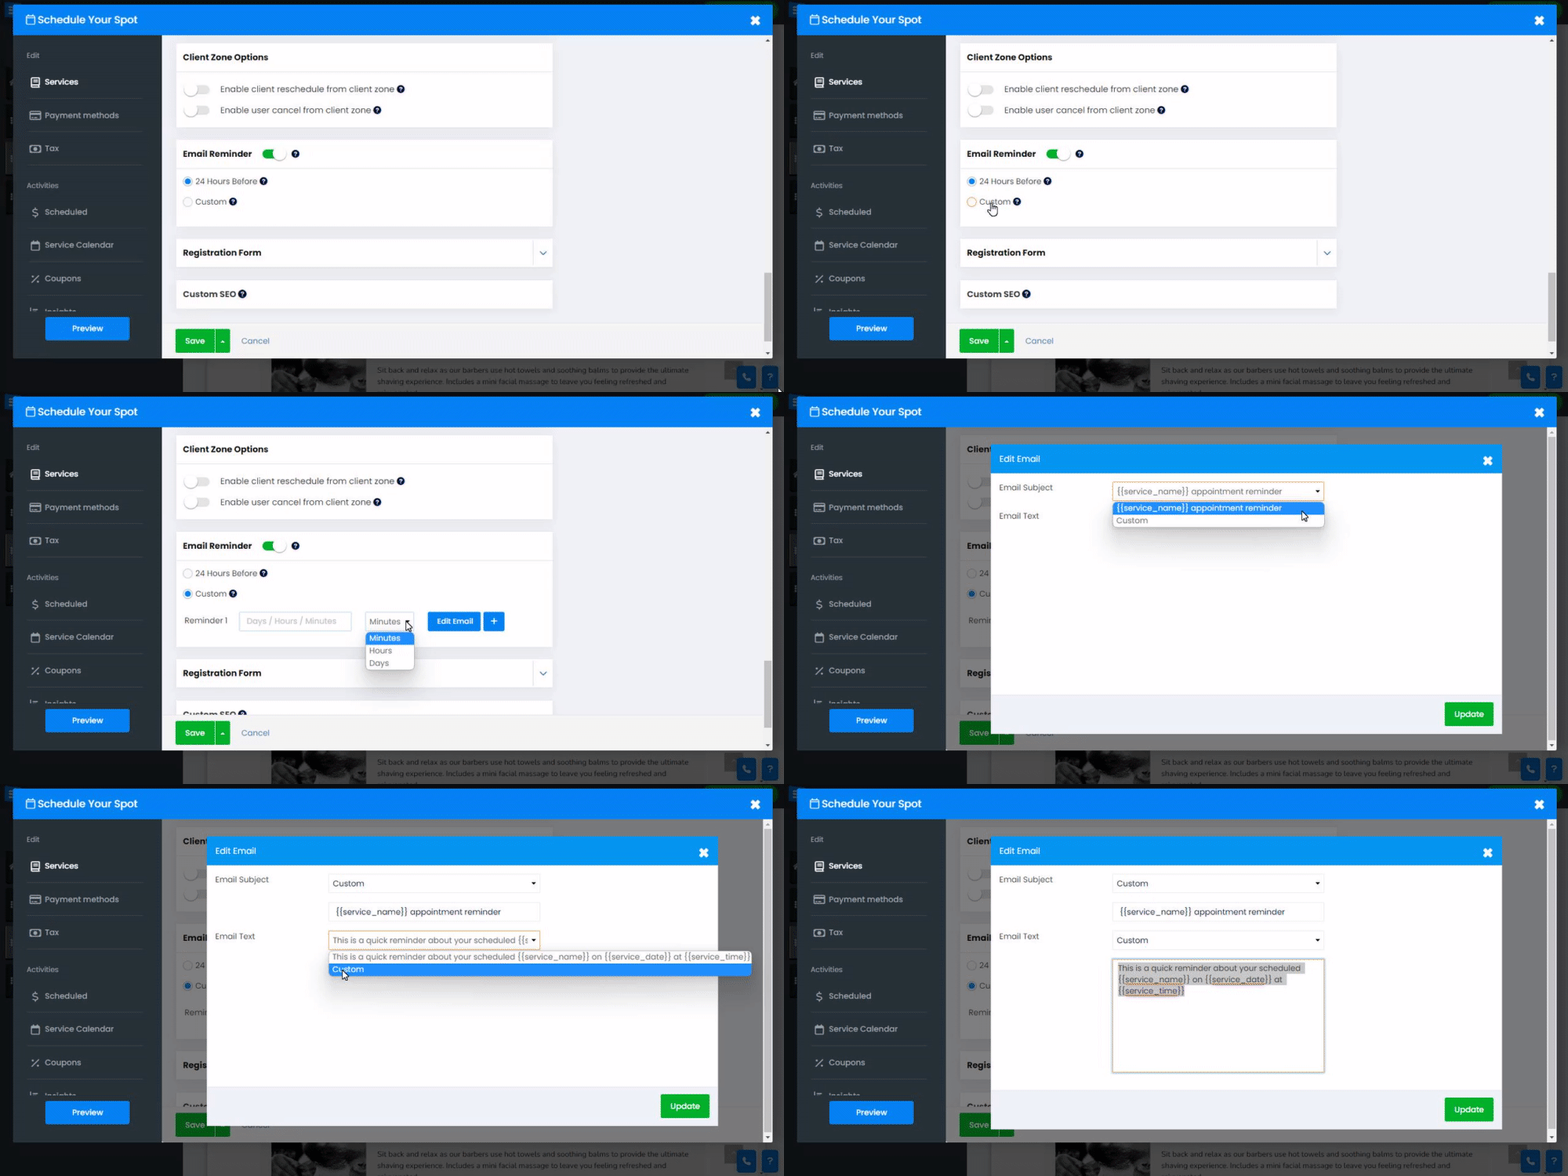
Send a reminder to your clients about an upcoming scheduled service
Set the reminder to be sent within 24 hours before the scheduled date, or use the Custom option to customize both the time the reminder would be sent as well as the content of the reminder email.
Your users will also have the option to add booked services to their calendars using the Add to Calendar option in their checkout form.
👉 Note: The Custom option is only available for the platinum package. Learn more about Upgrading your website
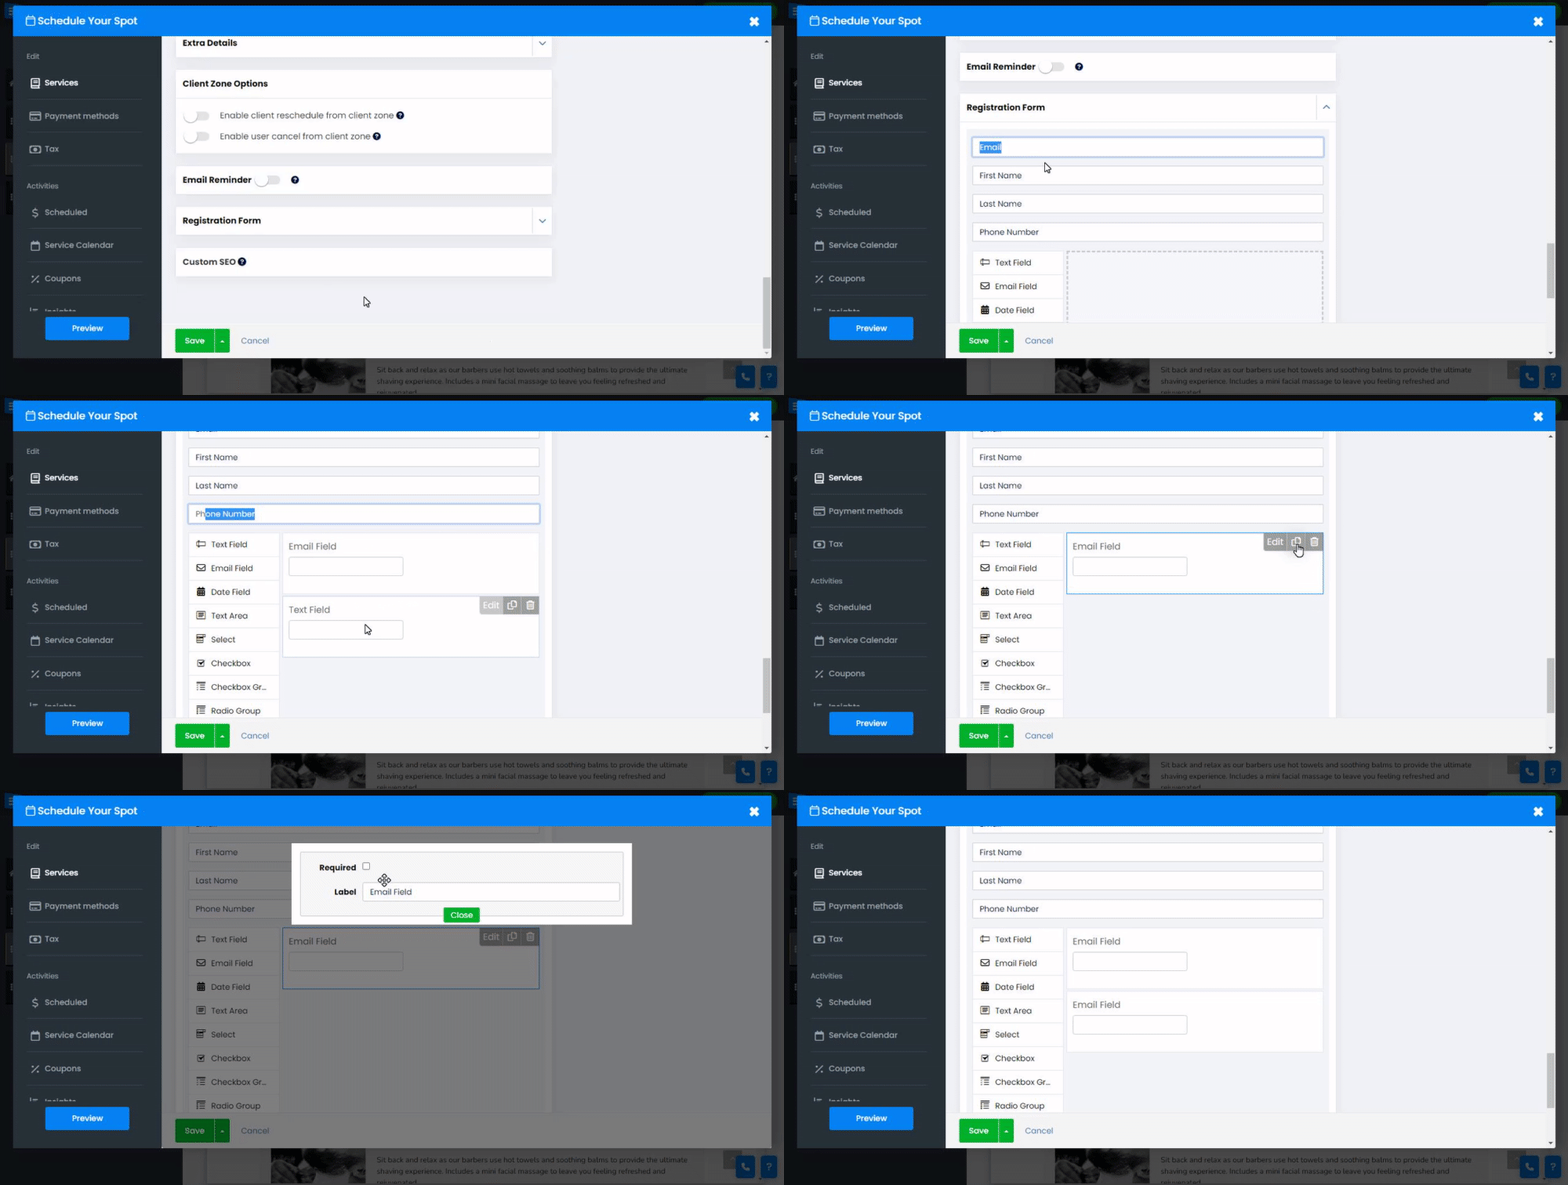
Create a custom Registration Form for visitors to fill out when booking a service.
Read more about the use of the custom form builder.
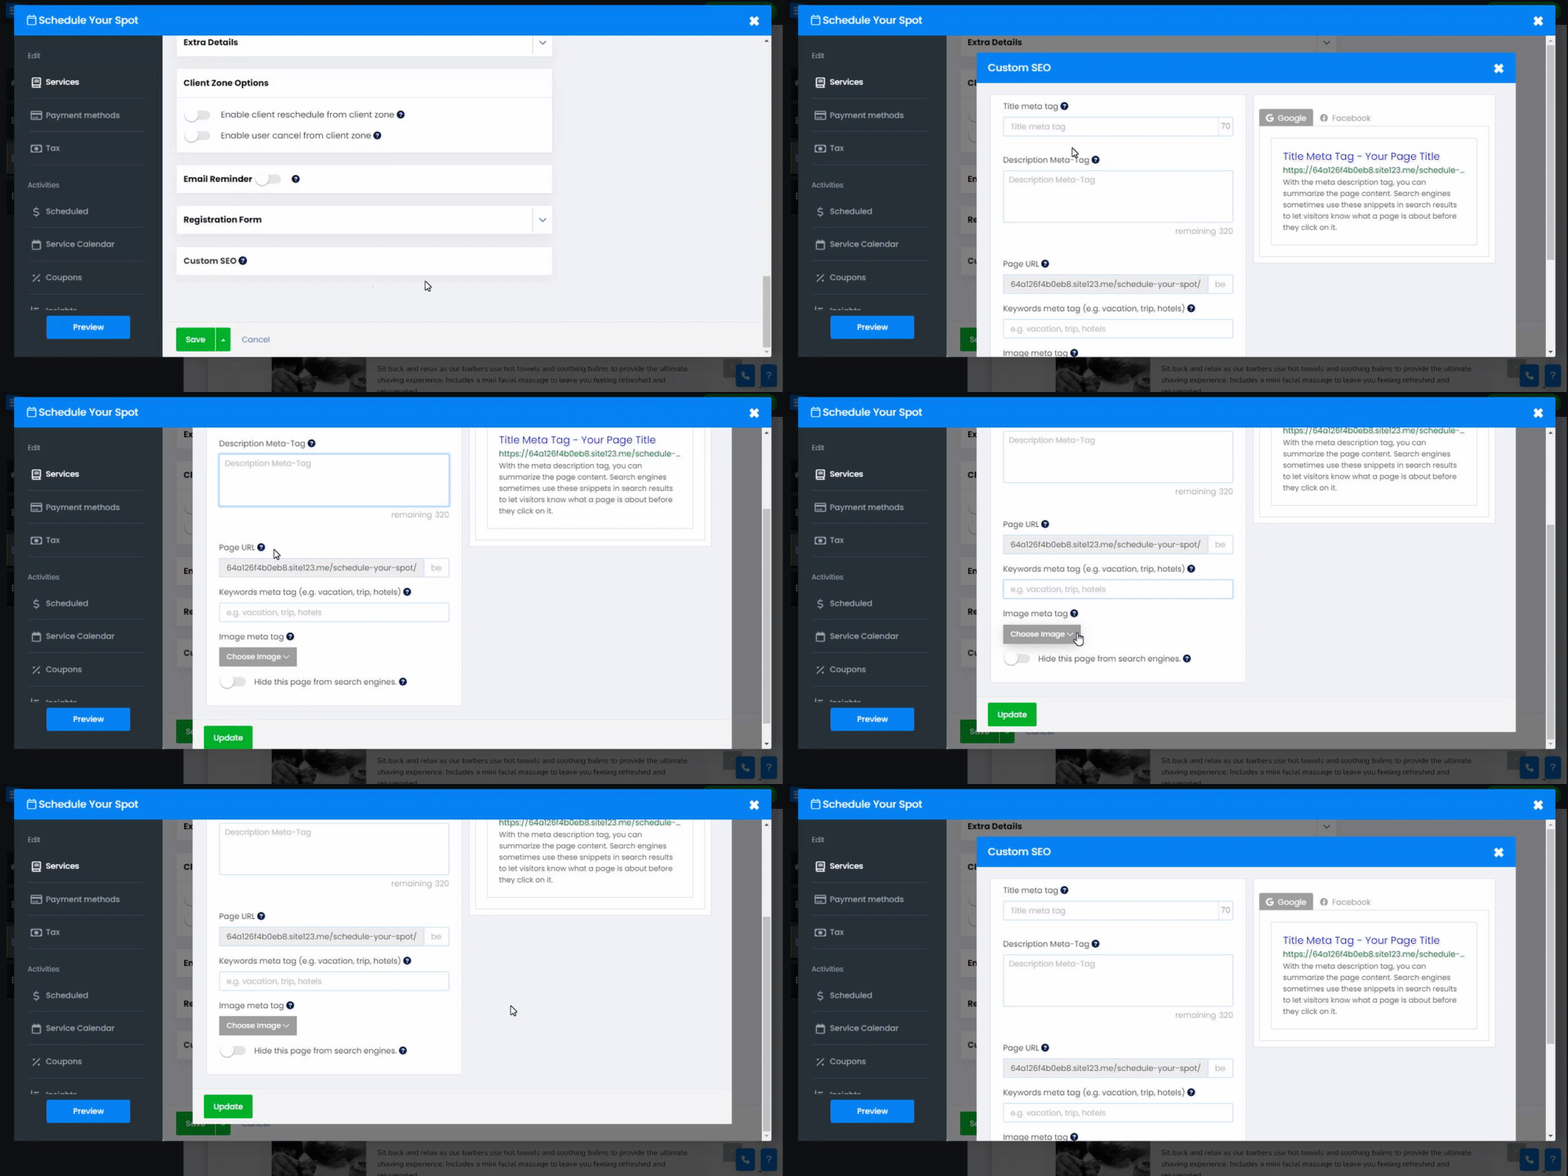
Adjust the SEO settings of your different services. Read more about Custom SEO.
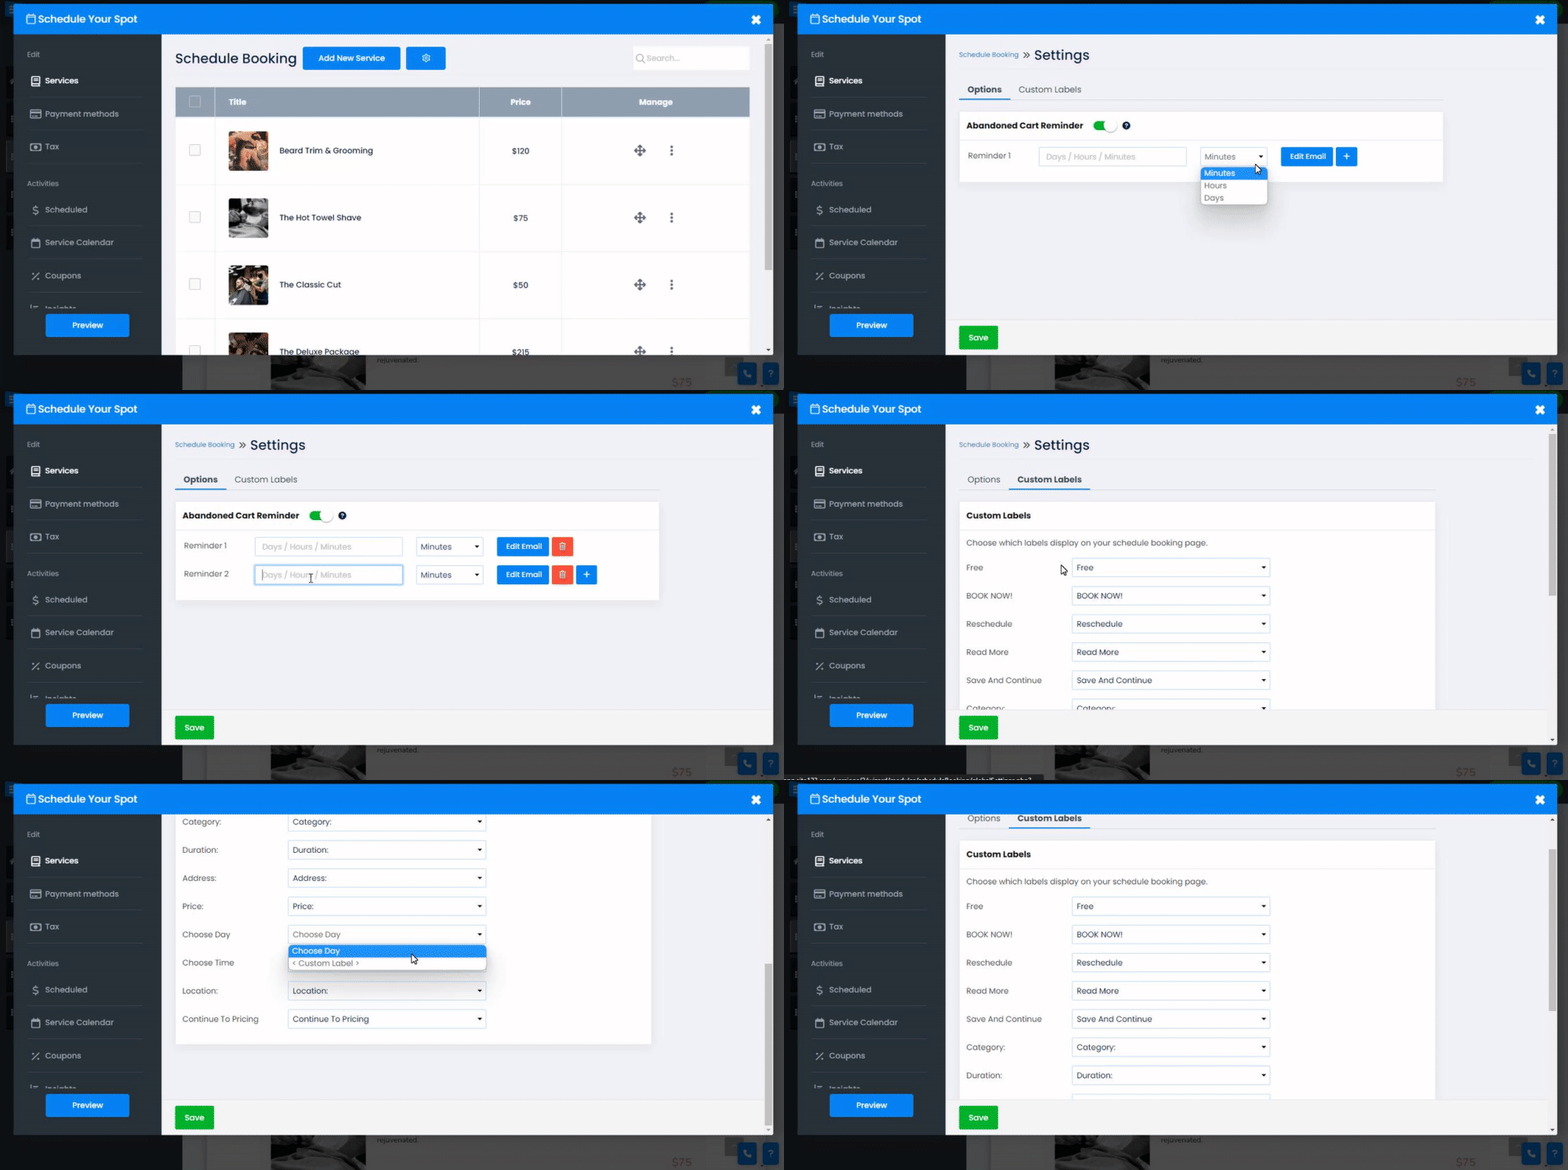
In the service tab, click the gear Icon to enable abandoned cart reminders and edit Custom labels.
Options tab - Abandon Cart reminder - Toggle this option ON to send email reminders to your clients who did not complete their purchase. This will allow you to encourage your users to complete the transaction and book the desired service.
Custom Lable - Create custom labels that will be presented when a client is booking a service. This will allow you to customize your booking page further.
Inside the Payment Methods tab, set your accepted currency and payment methods. Read about setting Currency and Payment Methods.
Inside the Tax tab, add regions and tax. Read about setting Tax.
Inside the Scheduled tab, see the list of all the bookings, filter them by status, date, and type, and manage them. Read about Checking Your Orders.
Inside the service calendar tab, you will see all your scheduled appointments organized in a convenient calendar view.
This will allow you to organize and streamline your appointments,
View your appointments in daily, weekly, monthly, or list format and print the selected display.
seamlessly integrates external systems and services with your booking process, enhancing automation and efficiency.
Reschedule Webhook - We have introduced a new webhook specifically designed for schedule booking rescheduling. This webhook enables you to receive real-time updates and notifications whenever a booking is rescheduled, allowing you to synchronize the changes with your preferred external systems.
Cancel Order Webhook - Additionally, we have added a webhook for schedule booking order cancellations. This webhook ensures that you receive instant notifications whenever an order is canceled, allowing you to take necessary actions and keep your external systems up to date. Learn more about setting up webhooks.
Inside the Coupons tab, create coupons to give special deals and discounts. Read about Creating Coupons.
Inside the Insights tab, monitor and analyze booking activity.